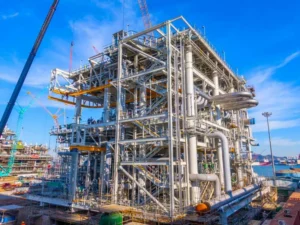
Imagine if just one miscalculation in your platform design caused a project shutdown or, even worse, an accident. That’s not a risk we want to take, and it’s exactly why precise load and stress calculations matter so much in industrial steel platforms.
When we need to calculate load and stress for a steel platform, we always start by defining all loads acting on the structure—dead loads, live loads, environmental loads, and dynamic loads. We carefully follow local design codes to determine load values, add a safety margin, select proper steel members, check deflections as well as strength, and don’t forget documentation for compliance and future reference.
Many people focus only on cost or speed. But from my years of work on factory floors and industrial sites, the greatest savings come from getting the basics right—the first time. Simple mistakes like missing a key environmental load or assuming you know the machinery weights have the potential to create headaches for years to come. I want to share how, step by step, you can build a platform calculation strategy that makes sense, keeps you out of trouble, and earns long-term trust.
What types of loads must be considered in industrial steel platform design?
If you cut corners on loads, you build in risk. I still remember the time we nearly missed a critical snow load on a warehouse in northern China—one heavy winter would have meant disaster. After that, we never skipped this discussion again.
Loads on steel platforms are not just a single number. We always consider the following:
- Dead Load: This is the weight of the platform itself. Every beam, column, deck, and connection counts.
- Live Load: The variable weight from people, machinery, stored goods, and occasional equipment.
- Environmental Load: Factors like wind, snow, and seismic forces. Sometimes they seem minor, but in the wrong location, they can dominate the entire design.
- Dynamic Load: Moving loads from forklifts, vibrating equipment, or impacts.
Let’s look at this as a table for clarity:
| Load Type | What is it? | Where to find values |
|---|---|---|
| Dead Load | Steel structure self-weight | Fabrication drawings, BOM |
| Live Load | People, goods, vehicles, machinery | Local codes, project requirements |
| Environmental | Wind, snow, earthquake | Local data, codes |
| Dynamic Load | Vibrations, impacts, moving equipment | Equipment specs, site surveys |
Our experience is that no two factories or project sites are the same. I always recommend taking a walk around the plant—see what’s on the floor, who’s at work, and which machines get moved the most. Surprises come not from calculations, but from assumptions.
How do you determine appropriate loading values for platform calculations?
Theory only takes you part of the way. One of my favorite stories was about a client who thought 5 kN/m² was enough for “everything,” based on a catalog value. When we toured his old warehouse, we discovered much heavier machinery being placed every month. That’s when I realized: get real numbers, not just code numbers.
Here’s our approach, boiled down:
- Check the Codes: Every platform must follow local standards—like AISC for the US or GB50017 in China. We always get the latest version to find the minimum recommended live and environmental loads.
- Talk to the Users: The most reliable information comes from the people who will operate the platform. What do they plan to store? Will forklifts drive across it? How many people will assemble during a shift change? The answers can change your numbers—sometimes doubling them.
- Measure the Structure: For dead loads, we total up the weight of all steel members and any attached finishing materials (like grating or handrails).
- Get Site Data: Environmental loads depend on your location. Wind speed, snow thickness, seismic maps—all require local verification. We request these from the client or tap local engineering bureaus.
- Add a Safety Margin: No real project matches the drawings perfectly. We always add at least 10-15% margin in our calculations to cover unplanned events or possible future upgrades.
It’s a process that takes effort, but over the years, we’ve seen more problems from undersized platforms than oversized ones.
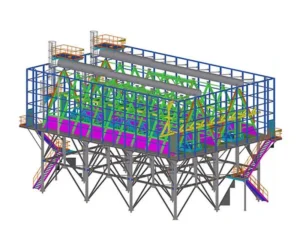
How do you select structural steel members for load and stress?
Our philosophy is simple: Don’t let a weak link let you down. When choosing beams, columns, and decks, go through every element like it’s the most important.
We start with the main load (moment) calculation for beams. For instance, a simply supported beam that spans 6 meters and supports a combined load can be figured as follows:
- Total load per meter: Multiply design load by the span. If your beam covers 6 meters and total load is 5 kN/m², then that’s 5 × 6 = 30 kN uniformly distributed over the beam.
- Bending Moment:
M_max = w × L² / 8
Here, w is the load per meter, and L is the span length. - Section Modulus (W):
σ = M / W
σ should be less than or equal to the steel’s yield strength (e.g., 235 MPa for Q235)—but I always specify a profile at least 10% stronger, to account for real-world imperfections. - Shear Check:
Make sure no cross-section will shear under the maximum load, especially at supports. - Deflection:
As per most codes, deflection should not exceed L/200 for beams. Even with enough strength, too much bounce or sag causes real operational problems. I advise running this check and upsizing the member if there’s even a doubt. - Column Buckling:
For vertical supports, check slenderness ratio and risk of buckling. Reinforce or brace if you’re close to the limit. - Connections:
This is the field’s “silent failure.” I’ve seen dozens of projects with perfect beams but under-designed bolts or welds. Adjust size and number according to the actual forces, not just a typical detail.
Here’s an overview table:
| Item | Key Calculation | Code/Limiting Value | Common Mistake |
|---|---|---|---|
| Beams | M_max = w × L² / 8 | Stress < Yield, Deflection < L/200 | Size for strength, miss deflection |
| Columns | Slenderness, buckling | Lambda < Code | Skip bracing |
| Connections | Shear, bearing, tension | As per bolt/weld code, actual geometry | Copy details, ignore actual forces |
Sometimes the numbers look safe, but experience says otherwise. That’s when a little extra steel—or a double-check—pays huge dividends.
Why are serviceability and safety factors essential, and how are they applied?
Many people obsess over ultimate strength but forget how annoying a vibrating platform can be. In one US plant, operators avoided an expensive mezzanine because it “felt unsafe,” even though strength was fine—it simply deflected too much. I had to explain to the owner that comfort and perception are as important as raw calculation.
Here’s how we ensure both safety and usability in every project:
- Deflection Limits: Most codes cap deflection at L/200. We always check actual numbers after assembling all the loads and compare them not just with the standard, but also with what the client expects. It’s better to tell the client you’ll add one extra beam for stability than hear complaints after installation.
- Safety Factors: We multiply the calculated loads by a safety factor (generally 1.5–2.0), as required by codes. This margin covers hidden defects, possible overloads, and human error—one thing I always mention, because field conditions are rarely perfect.
- Load Combinations: Real-world loads rarely occur in isolation. We always consider combined scenarios—dead load plus live load, or dead load plus wind. Codes like AISC and Eurocode lay out exactly how to combine these based on local risks.
A simple summary:
| Serviceability | How We Check | Result |
|---|---|---|
| Beam Deflection | Compare max deflection to L/200 | No complaints, longer life |
| Vibration | Choose higher stiffness for sensitive areas | Safe, comfortable use |
| Safety Factor | All loads × Safety Factor | Margin for the unexpected |
I’ve seen budgets cut corners here, but the repairs and claims later always cost more. A little caution now saves a lot of trouble later.
How do you perform and document load and stress calculations for clients and compliance?
Transparency is powerful. I’ve won contracts not just because of our prices, but because customers trust our calculations, drawings, and reports. I encourage everyone on our team to treat documentation as both an audit tool and a sales opportunity.
Here’s our proven checklist:
- Calculation Reports: We provide detailed write-ups showing all design loads, calculations, stress checks, deflection figures, safety margins, and limiting values. Clients and auditors can follow every step.
- Drawings: Each drawing is annotated with load data and member sizes—we don’t leave room for ambiguity.
- Material Certification: For large or critical beams, we attach mill certificates, proving material grade and compliance.
- Compliance Table: We list out the relevant local code and show exactly where and how it’s met within our package.
- Third-Party Review: For complex or high-value projects, an independent engineer checks and stamps the calculation and design. Some clients demand this, and it often reassures them during big audits.
Here’s a simplified documentation checklist:
| Document Type | Why it Matters | What to Include |
|---|---|---|
| Calculation Report | Transparency, reduces disputes | Loads, formulas, final values |
| Drawing | Field reference, clear instructions | Member sizes, connection details |
| Material Certification | Quality assurance | Mill certs, manufacturer info |
| Compliance Table | Speeds audits, builds trust | Code references, checks per item |
| Third-Party Check (if needed) | Reassures clients, covers risk | External engineer’s stamp/opinion |
This level of documentation shows our attention to detail and signals to the customer: we’re serious, reliable, and accountable.
Conclusion
Accurate, real-world calculations and solid documentation are the real foundations of a safe, durable steel platform. When we respect every detail—loads, codes, and comfort—we build solutions that last and stand up to scrutiny.